Master One-Handed Ball Handling: 7 Game-Changing Drills to Transform Your Control
Understanding the Science of Ball Control
Before diving into the drills, it’s crucial to understand the biomechanics behind effective ball handling. As explored in our complete dribbling guide, successful ball control relies on three key elements:
- Finger pad sensitivity and strength
- Wrist flexibility and control
- Forearm muscle endurance
These components work together to create what professional trainers call the “touch triangle” – the foundation of elite ball handling. By developing each element through targeted practice, you’ll build the neural pathways necessary for instinctive ball control.
Essential Equipment and Setup
To maximize your training effectiveness, gather:
- 1 regulation basketball (properly inflated to 7.5-8.5 PSI)
- Open space (minimum 15×15 feet)
- 6-8 markers or cones
- Timer or stopwatch
- Notebook for progress tracking
- Non-slip basketball shoes
The 7 Game-Changing Drills
1. The Spider Dribble
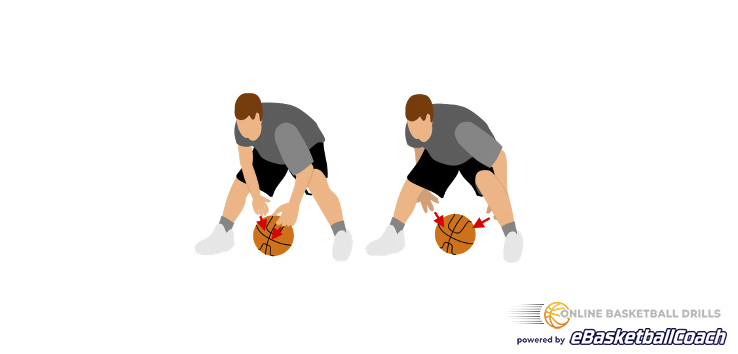
This fundamental drill builds the foundation for advanced handling. Similar to drills mentioned in our elite ball control guide, the Spider Dribble develops finger strength and ball control.
Basic Execution:
- Start in an athletic stance, feet shoulder-width apart
- Keep your knees bent at 45 degrees
- Dribble the ball around each leg in a figure-8 pattern
- Maintain a low, controlled dribble height
- Perform for 30 seconds, then switch hands
Progressive Variations:
- Level 1: Stationary figure-8
- Level 2: Walking figure-8
- Level 3: Speed figure-8
- Level 4: Figure-8 with eyes closed
2. Wall Touches
This drill enhances ball control and reaction time, crucial for game situations where quick adjustments are necessary.
Detailed Execution:
- Position yourself 2 feet from a smooth wall
- Start with gentle bounces to develop rhythm
- Progress to harder throws for increased difficulty
- Focus on catching with fingertips, not palms
- Complete 50 touches per hand
Advanced Variations:
- Alternating heights
- Different angles
- Rapid-fire touches
- Moving laterally while performing touches
3. Single-Hand Speed Dribbles
Building on our comprehensive dribbling tips, this drill focuses on developing lightning-quick control.
Key Technique Points:
- Keep your fingers spread wide
- Use quick, controlled wrist snaps
- Maintain dribble height below knee level
- Progress from stationary to moving drills
Speed Progression Protocol:
- 30 seconds stationary speed dribbles
- 30 seconds walking speed dribbles
- 30 seconds jogging speed dribbles
- 30 seconds sprinting speed dribbles
4. Cross-Body Control
This advanced drill improves coordination and prepares you for game-time pressure.
Technical Breakdown:
- Start with diagonal dribbles across your body
- Focus on maintaining consistent ball height
- Keep your eyes forward, not down
- Add defensive sliding while dribbling
5. The One-Hand Zigzag
Perfect for developing game-speed control and direction changes.
Setup and Execution:
- Place 5 cones in a zigzag pattern, 5 feet apart
- Start at the first cone in athletic stance
- Dribble with one hand through pattern
- Focus on sharp changes of direction
- Maintain low, protective dribble height
Advanced Implementation Strategies
To maximize your development, incorporate these professional training principles:
Weekly Progress Plan
- Monday: Focus on Spider Dribble and Wall Touches
- Tuesday: Speed Dribbles and Cross-Body Control
- Wednesday: Zigzag and Recovery Drills
- Thursday: Comprehensive review of all drills
- Friday: Game-speed application
- Saturday: Light practice or rest
- Sunday: Rest and recovery
Common Mistakes and Solutions
Mistake 1: Palm Dependence
Many players rely too heavily on their palms instead of their fingertips. This limits control and speed. Solution: Practice the “light touch” drill – dribbling with only your fingertips touching the ball.
Mistake 2: Speed Before Control
Players often rush to perform drills at high speeds before mastering the basic movements. Solution: Follow the 80/20 rule – 80% of practice at controlled speeds, 20% at game speed.
Mistake 3: Inconsistent Practice
Sporadic practice leads to slower improvement. Solution: Schedule specific times for ball handling work, even if just for 15 minutes daily.
Game Application Scenarios
Understanding how these drills translate to game situations is crucial. Here’s how each drill applies:
- Spider Dribble: Maintaining control in tight spaces
- Wall Touches: Recovering loose balls and quick reactions
- Speed Dribbles: Fast break situations
- Cross-Body Control: Creating space against defenders
- Zigzag: Navigation through defensive pressure

How long until I see improvement?
With dedicated practice, expect noticeable improvements in:
- 2-3 weeks: Basic control enhancement
- 4-6 weeks: Significant confidence improvement
- 8-12 weeks: Advanced handling capabilities
Should I practice with a weighted ball?
As mentioned in our training guide, stick to regulation balls initially. Weighted balls can be introduced after mastering basic techniques.
Can these drills help with game pressure?
Yes! Regular practice creates muscle memory that holds up under pressure. Check out our youth basketball drills for additional pressure-training exercises.
Measuring Progress
Track your development using these metrics:
- Time maintaining continuous dribble
- Speed through cone patterns
- Number of successful repetitions
- Comfort level with non-dominant hand
Conclusion
Mastering one-handed ball handling is a journey that requires dedication, patience, and consistent practice. By following these drills and progression plans, you’ll develop the control and confidence needed to handle any game situation. Remember, every elite player started with these fundamentals – your path to advanced ball handling starts here.
Ready to take your game to the next level? Visit Basketball Fundamentals for more advanced drills and tutorials. Don’t forget to check out our free video tutorials for visual demonstrations of these techniques!
