
How to Build a Backyard Basketball Training Setup on a Budget
Are you dreaming of transforming your backyard into a basketball training paradise without breaking the bank? Whether you’re a parent looking to nurture your child’s hoop dreams or an enthusiast wanting to improve your game at home, creating an affordable backyard basketball setup is entirely possible with some smart planning and creativity.
Why Build a Backyard Basketball Training Setup?
Before diving into the how-to, let’s talk about why a home basketball court is worth every penny:
- Convenience: Practice anytime without traveling to public courts
- Skill development: Consistent daily practice leads to faster improvement
- Family bonding: Create opportunities for fun family activities
- Health benefits: Encourage regular physical activity right at home
- Cost savings: Save money on gym memberships and court rentals over time
Having your own backyard basketball space provides a “private practice ground” where you can hone your skills in a comfortable environment. Let’s explore how to create this training oasis without emptying your wallet.

Planning Your Backyard Basketball Space
Assess Your Available Space
First, determine how much area you can dedicate to your basketball setup. While professional courts are huge, your backyard version can be scaled down considerably:
- Full court: 94ft × 50ft (professional size – rarely feasible for backyards)
- Half court: 47ft × 50ft (still quite large)
- Quarter court: 35ft × 30ft (good middle ground)
- Small shooting area: 20ft × 15ft (perfect for limited spaces)
Don’t worry if you can’t fit a regulation-sized court. You can “scale it down to whatever dimensions you can accommodate” while still creating a functional practice area. Understanding the basketball court layout will help you design an effective smaller version.
Set a Realistic Budget
A complete backyard basketball setup can range from a few hundred dollars for a basic hoop to thousands for a full court with premium surfacing. For a budget-friendly approach, consider:
- Basic setup: $300-800 (portable hoop and basic surfacing)
- Mid-range setup: $800-2,000 (in-ground hoop and improved surfacing)
- Premium setup: $2,000-5,000+ (quality court with better materials)
Remember that “it is possible to spread the benefits of playing sports daily without having a large budget” by making smart choices about what to prioritize.
Essential Components of Your Budget Basketball Setup
1. The Basketball Hoop: Your Most Important Investment
The basketball hoop is the centerpiece of your setup. Here are your options:
Portable Basketball Hoops
Pros:
- Most affordable option (starting around $100-300)
- Can be moved when needed
- No permanent installation required
- Great for renters or those with limited space
Cons:
- Less stable than in-ground options
- May deteriorate faster in harsh weather
- Lower quality backboards on budget models
In-Ground Basketball Hoops
Pros:
- Maximum stability for dunking and aggressive play
- Longer lifespan than portable systems
- More professional feel and appearance
- Takes up less ground space
Cons:
- Higher initial cost (starting around $300-800)
- Permanent installation requires concrete
- Installation may require permits in some areas
When choosing a basketball hoop, consider factors like backboard material, adjustable height features, and durability to find the best match for your “family’s needs” and budget.
Backboard Materials
Your backboard material affects both price and performance:
- Polycarbonate/plastic: Most affordable, somewhat durable but lower rebound quality ($100-300)
- Acrylic: Mid-range option, better rebound than plastic ($200-500)
- Tempered glass: Premium option, professional-level rebound ($500-1,500+)
As noted by sporting goods retailers, “Acrylic backboards look similar to tempered glass but are often more budget-friendly and may provide slightly different bounce results.”
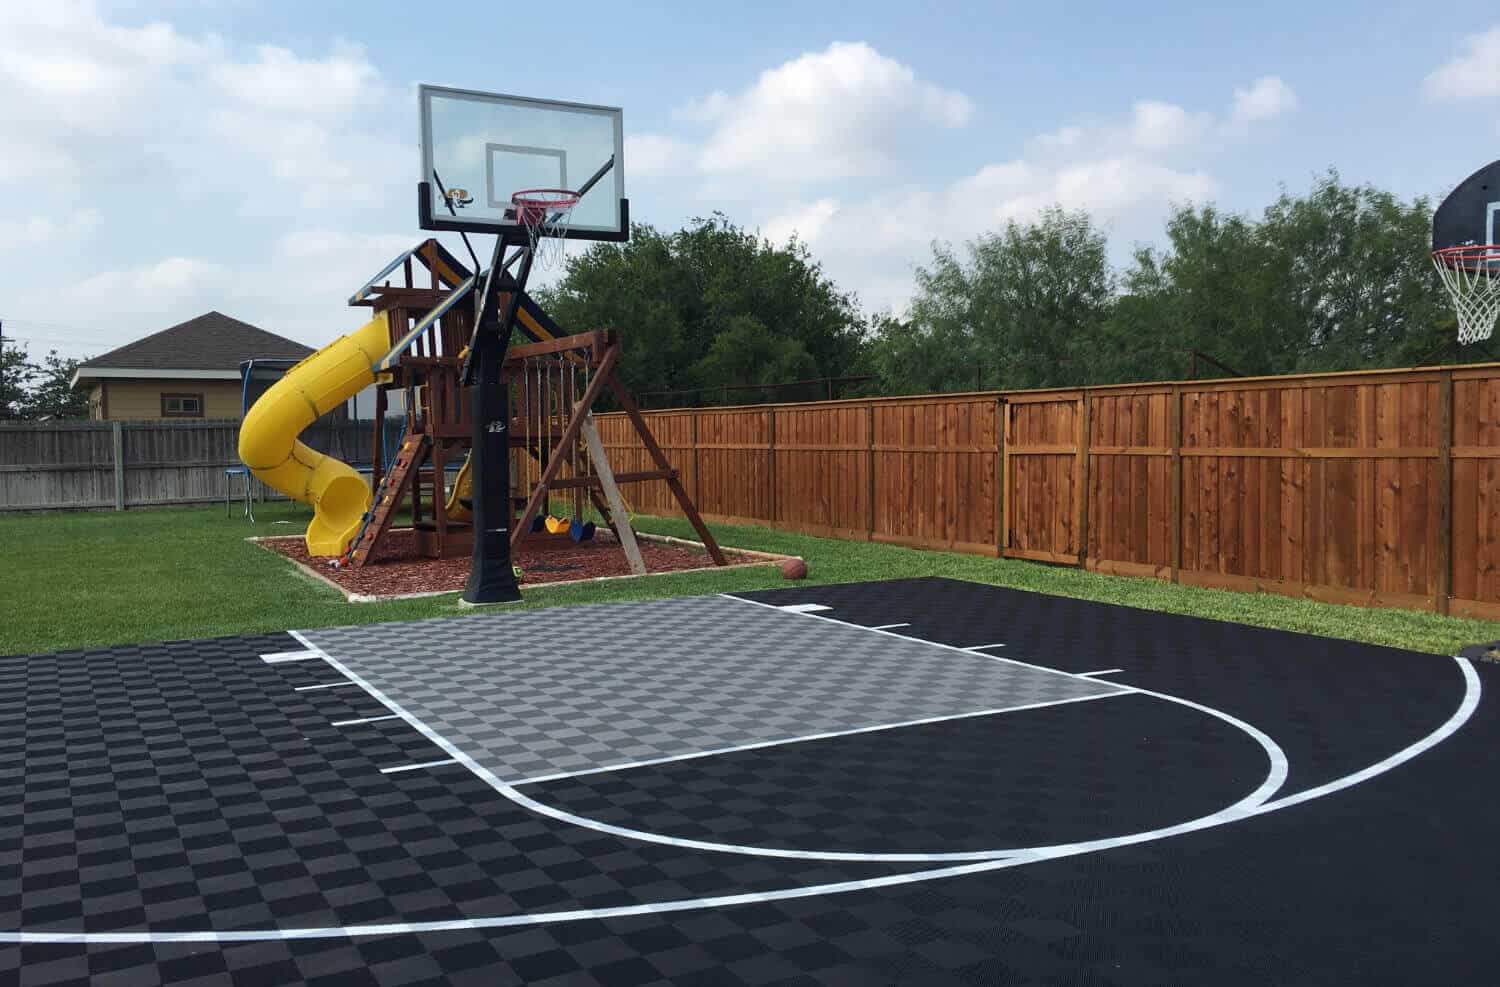
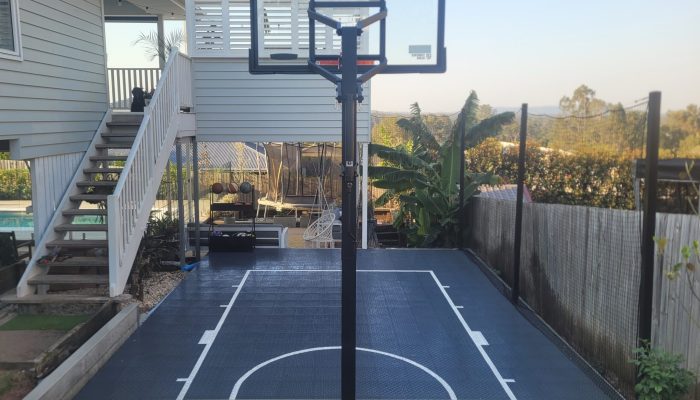
2. Court Surface Options
Your playing surface dramatically affects your game experience. Here are budget-friendly options:
Existing Concrete/Driveway
Pros:
- No additional cost if already available
- Durable and weather-resistant
- Low maintenance
Cons:
- Hard on joints
- May have slopes or cracks
- Can get hot in summer
Asphalt
Pros:
- Affordable option for backyard courts
- Provides good ball bounce
- Relatively durable
Cons:
- Installation costs if you don’t already have it
- Requires professional installation
- Needs resurfacing every few years
Modular Tiles
Pros:
- These interlocking polymer tiles sit on top of existing concrete surfaces to improve play experience
- Reduces joint impact compared to concrete
- Available in multiple colors
- DIY installation possible
Cons:
- Higher cost than just using existing concrete ($3-7 per square foot)
- May shift if not properly installed
- Some cheaper versions deteriorate in harsh weather
Concrete Slab
Pros:
- Extremely durable
- Excellent ball bounce
- Professional appearance
Cons:
- Highest initial cost ($4-8 per square foot installed)
- Requires professional installation
- Permanent addition to property
For those on a tight budget, “there are plenty of ways to execute [a court] without having to spend way over budget,” including using existing surfaces or phasing the project.
DIY Basketball Training Equipment on a Budget
The beauty of a backyard setup is that you can enhance it with affordable training equipment. Here are some budget-friendly ideas:
Agility and Footwork Training
- Agility ladder: A simple ladder placed on the ground helps “improve your speed, agility, and quickness” for both offensive and defensive movements ($15-30)
- Floor markers: These “low profile + no-slip court markers” are safer than cones and perfect for marking training stations or dribbling pathways ($10-20)
- Jump rope: A basic rope can “improve your footwork, stamina, and coordination” while providing cardio training ($5-15)
Working on your basketball footwork is crucial for developing your overall game, and these affordable tools can help tremendously.
Shooting and Ball Handling
- Dribbling gloves: Help develop ball control by making handling more challenging ($10-25)
- Dribbling goggles: These “obscure the lower part of the wearer’s field of view” forcing players to dribble without watching the ball ($15-30)
- Homemade rebounding net: A simple tarp with bungee cords can return shots to you when practicing alone
- Tennis balls: Used in “advanced basketball dribbling drills” to improve hand-eye coordination and handling skills ($3-8)
Improving your dribbling skills and shooting form should be top priorities in your training regimen. These affordable tools can significantly enhance your practice sessions.
Strength and Conditioning
- Resistance bands: Versatile for basketball-specific strength training ($15-40)
- Weighted basketball: Improves strength for shooting and passing ($25-50)
- Homemade defensive dummy: PVC pipe with pool noodles can simulate a defender for shooting practice
Adding strength training to your routine will help improve your game and reduce injury risk.
Essential Basketball Training Drills for Your Backyard Court
Having your own court means unlimited practice time. Here are effective drills that need minimal space:
Shooting Drills
- Five-Spot Shooting: Mark five positions around the hoop and take 10 shots from each
- Form Shooting: Focus on perfect technique from close range (50-100 shots)
- Game-Speed Shots: Take shots after quick movements to simulate game conditions
For more detailed shooting practice, check out these basketball shooting tips to develop a consistent and accurate shot.
Dribbling Drills
- Stationary Dribbling: Practice low, medium, and high dribbles with each hand
- Figure-8 Dribbling: Weave the ball through and around legs to improve control
- Cone Dribbling: Set up cones and practice changing direction and speed
For more ball-handling exercises, explore these dribbling tips that can transform your handling skills.
Footwork Drills
- Defensive Slides: Practice quick lateral movements along the baseline
- Jump Stop Drills: Sprint then execute clean jump stops to improve balance
- Pivot Practice: Master front and reverse pivots to protect the ball
Learning proper defensive techniques is just as important as offensive skills, and these drills will help you develop a solid defensive foundation.
As noted in NBA Jr. training materials, “Warming up is an extremely important part of basketball” so always begin your training sessions with dynamic stretches and light movement.
Making Your Basketball Setup Competition-Ready
Basketball is inherently “all about competition” and practicing competitive drills helps improve skills more quickly than just shooting around. Here are ways to add competitive elements to your backyard setup:
Competition Ideas
- Shooting Challenges: Track made shots out of 10 attempts from different spots
- Around the World: The classic shooting game moving around the perimeter
- HORSE: Take turns attempting creative shots
- One-on-One: Even in small spaces, you can play reduced court games
- Timed Drills: Set time limits for completing specific skill challenges
Check out these top basketball drills to integrate more competitive elements into your training routine.
Maintaining Your Budget Basketball Setup
Your investment will last longer with proper care:
- Inspect regularly: Check for loose bolts or cracks monthly
- Clean the surface: Sweep and wash the court surface regularly
- Weather protection: Consider covering the hoop during harsh weather
- Quick repairs: Fix small issues before they become major problems
- Seasonal check-ups: Do thorough inspections with season changes
Expanding Your Court Over Time
If budget constraints limit your initial setup, plan for gradual improvements:
- Start with the hoop: Begin with just a quality hoop on an existing surface
- Add court lines: Paint lines on your existing surface (approx. $50-100)
- Improve lighting: Add outdoor lighting for evening practice ($100-300)
- Upgrade surfacing: Save for better court surfacing as finances allow
- Add containment: Install netting to keep balls from leaving your property ($150-400)
Conclusion
Building a backyard basketball training setup doesn’t require professional athlete funding. With careful planning, smart material choices, and a phased approach, you can create a functional practice space that delivers results without emptying your wallet.
Remember that the most important element is consistency – even a simple hoop with daily practice will improve your game more than an expensive setup that’s rarely used. Start with what you can afford, use it regularly, and upgrade components as your budget allows.
Frequently Asked Questions
Do I need permits to build a backyard basketball court?
According to home improvement experts, “Any time you’re planning construction on your property, particularly a project as large as a basketball court, call the city or check their website to see if you need a permit.” Requirements vary by location.
What’s the minimum space needed for a usable practice area?
You can create a functional shooting and dribbling area in as little as 15ft × 20ft, though more space provides more training options.
How can I make my concrete driveway more joint-friendly for basketball?
Consider adding modular court tiles over the concrete, using athletic court paint with sand texture for better grip, or simply wearing quality basketball shoes with good cushioning. Check out our guide to choosing the right basketball shoes for more information.
Is it worth investing in an in-ground hoop versus a portable one?
If you own your home and plan to play regularly for years, an in-ground system typically offers better stability, playability, and longevity for your investment. Portable hoops are better for temporary setups or renters.
What’s the most important factor when buying a budget basketball hoop?
Adjustable height is crucial for developing proper shooting form and accommodating players of different ages. Also prioritize backboard size and rim quality over aesthetic features.